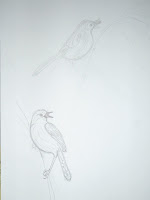
Good Morning dear readers, today I am going to show you from go to woe my latest little piece and how it sprang to life from a little pile of bits and pieces. For interests sake and to see what would happen, I decided to take the same starting point I used with my previous piece I showed you, the lovely Golden Headed Cisticola. So here’s where it all began…..
First I do sketches. I use an assortment of reference points being mainly books and photographs being particulary mindful NOT to breach copyright. I like to keep the bird reasonably accurate so get out the trusty bird identifier books – they are really good for shape and colour etc.
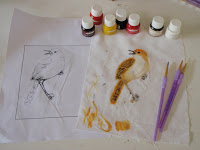
Next, I take the sketch I like the best, scan it into the computer and then print it out to the size I want it to be in the finished piece. I then trace that onto white fabric, with a normal drawing pencil. then comes the colouring in bit. For this bird, I used my new Tsunikeko inks that I had bought to paint it.
Then I select thread colours…. I ended up using all but 2 of the threads you see here, so quite a few colours went into him.
Then off to the machine. First I clean, oil and pop in a new needle and attach the darning foot. Next I fill my bobbin with a fine bobbin thread such as The Bottom Line, with something to match the top thread. I adjust my tension by loosening the top and I use a bobbin case I have especially for messing about with the tension screw.
 To prepare the painting for stitching, I stretch it in a wooden embroidery hoop. The trick here is to use one that you can do up with a screwdriver and get the fabric really taut.
 Then I begin to start stitching. I drop the feed dogs, take the stitch length down to zero, bring the bobbin thread to the top and away I go! There’s lots of thread changes, lots of threads and periodically I stop and draw the threads to the back of the work. When I’ve done stitching I cut it out just roughly at this stage. These are a couple of work in progress pics above.
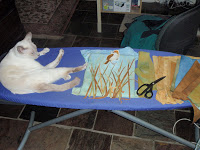 On to the background. I take my hand dyed piece I have selected as the base, (which I did weeks ago) and then start cutting strips of fabrics for the grass in selected colours. I have acquired some company at this point, looking for attention, no doubt.
But now I don’t like the background, I think it’s too light. So off to the paint pots. Here I go over the dyed fabric with paints.
 I like this much better, but now it throws out the grass colours I had previously selected, so I have to start again with grass strips.
 When I’m happy with the layout, I throw under some tear away and start pinning everything into place.

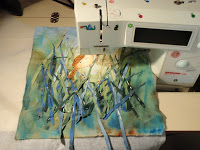 Back at the sewing machine, I free motion straight stitch everything down with clear monopoly thread. The bird gets stuck in place with fusible web near the end of this process.
Then I re-hoop the bird and stitch it in place along with more detailed embroidery to finish it off. The final grasses are stitched down over the bird, then the whole thing goes back onto the painting board for finishing touches here and there wherever I feel it needs lights/darks or colour balancing.


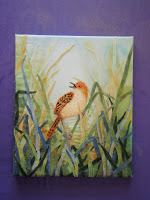
Lastly, the tediously slow process of removing the tear away, then I stretch it over a small artist’s canvas, staple it in place and voila! Finished!


Lastly, the tediously slow process of removing the tear away, then I stretch it over a small artist’s canvas, staple it in place and voila! Finished!

